Getting Started with N1010 Bulb Camera
If you have ordered the N1010 Bulb camera or if you are interested in this camera model, and want to get some basic information about this product before putting it in use or placing the order, you may refer to the below introduction.
Unboxing Video of N1010 Bulb Camera
Product Overview
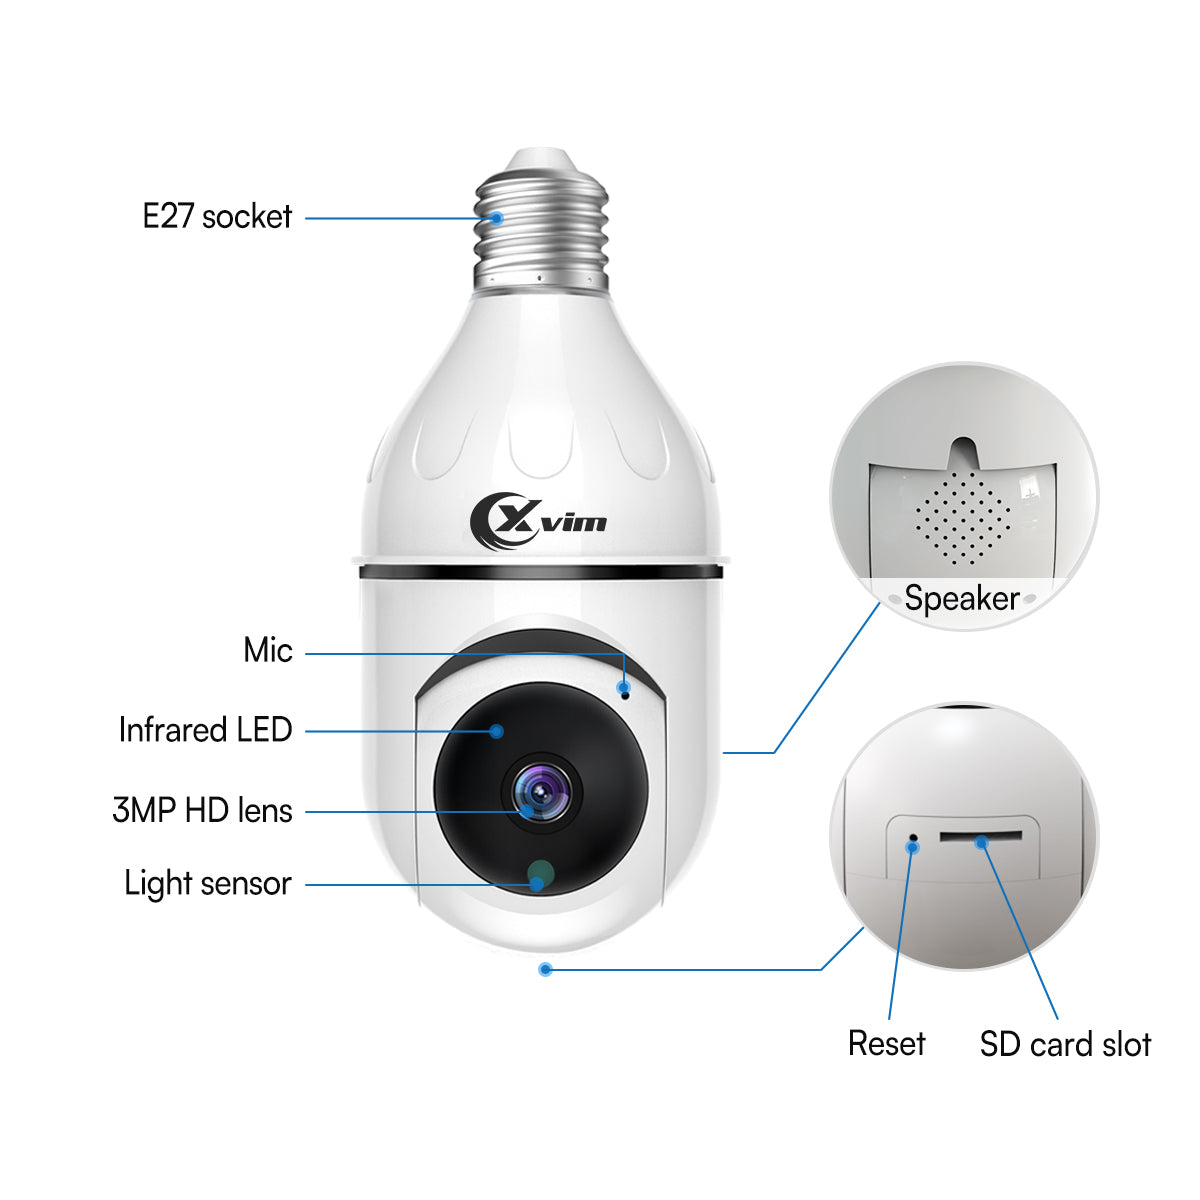
You may find detailed information about the structure and components of the camera here.

Product Overview
You can find detailed information about the camera construction and applicable WiFi here.
Before you connect the camera to WiFi, please make sure the WiFi meets the requirements:
WiFi Standard: IEEE 802.11b/g/n
Operating Frequency: 2.4Ghz
WiFi Security: WPA-PSK/WPA2-PSK
1. Download HoMeYe Pro APP
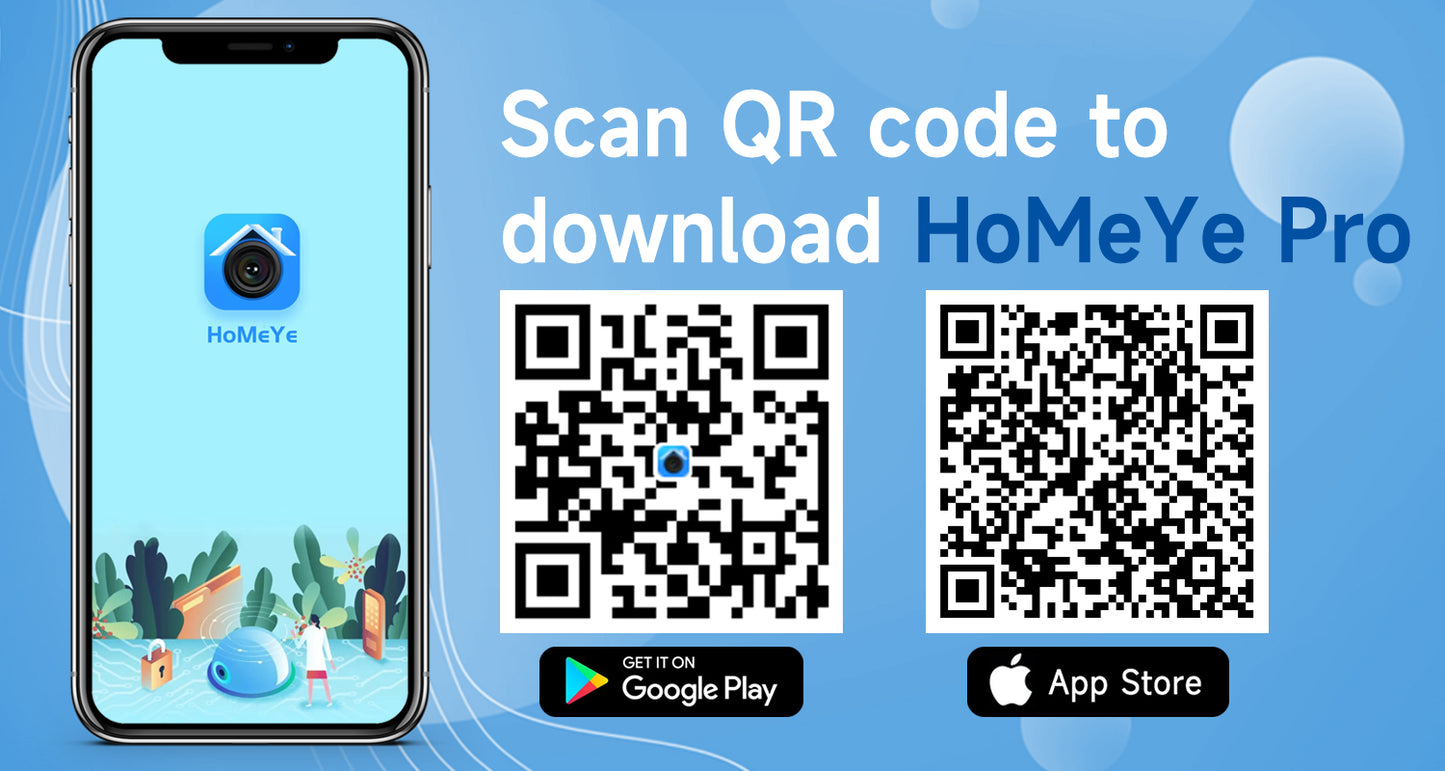
Please scan the QR code to download “HoMeYe Pro” app, or search the app named
“HoMeYe Pro” on App Store or Google Play to download.

2. Connect the Camera to Power
Please screw the camera into the E27 base directly and make sure the base is working, or plugged the camera into the equipped adapter for using in an electrical outlet.

3. Restore Factory Setting
After connecting the camera to power, you’ll hear “System starting up, waiting to be configured”, and the camera will rotate at the same time. Then please open the QR code on your phone first, and then insert the pin into the reset button on the camera, hold for 5-10 seconds until you heard "Restore factory setting, please don't power off > System starting up, waiting to be configured > Connecting, please read''. Then let the camera scan the QR code on your phone until you heard “Connected to router successfully”.
4. Add device in APP
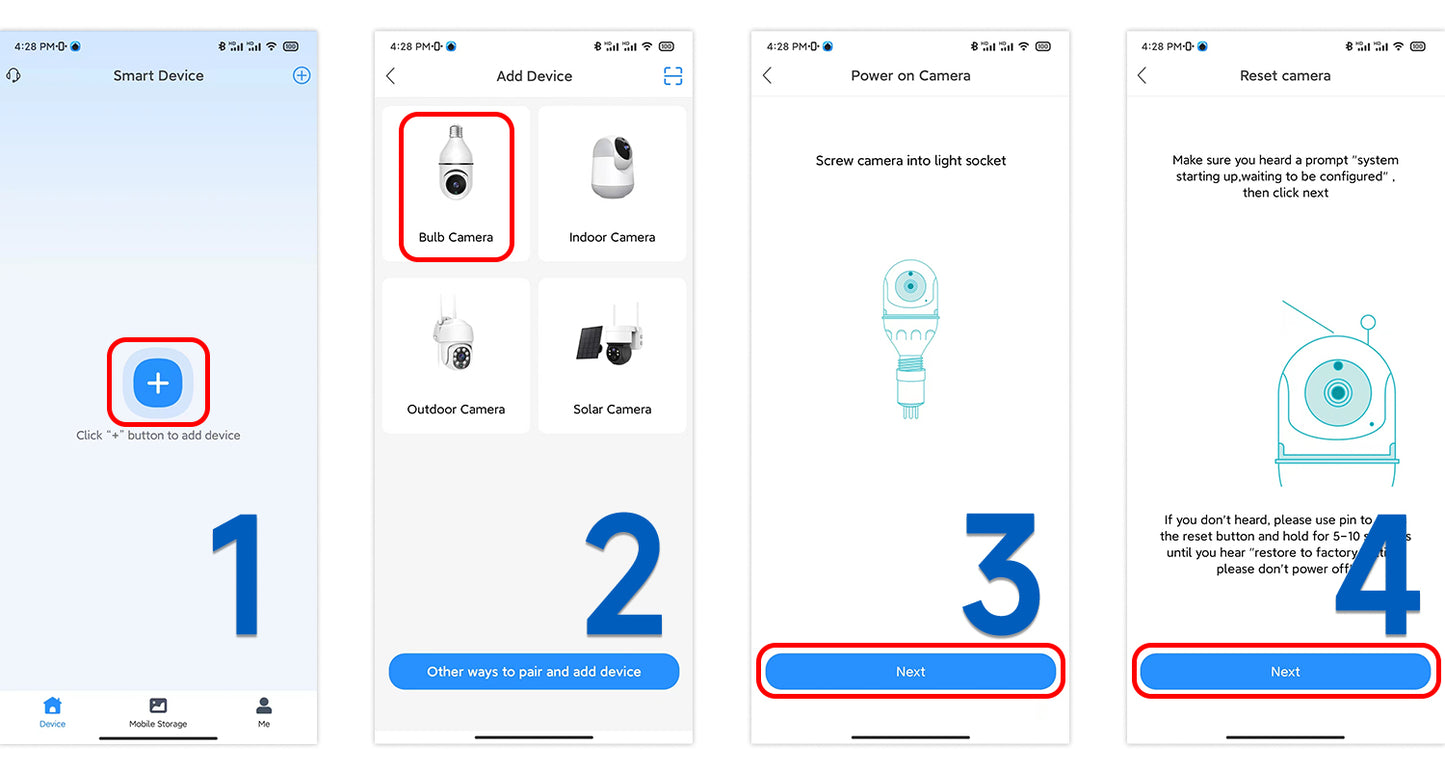
Please open “HoMeYe Pro” app, click “+” button to add the camera. Then click “Bulb Camera” into “Power on Camera” page, click “Next” into “Reset Camera” page, click “Next” again into “Router Setting” page.
5. Connect to 2.4G WiFi
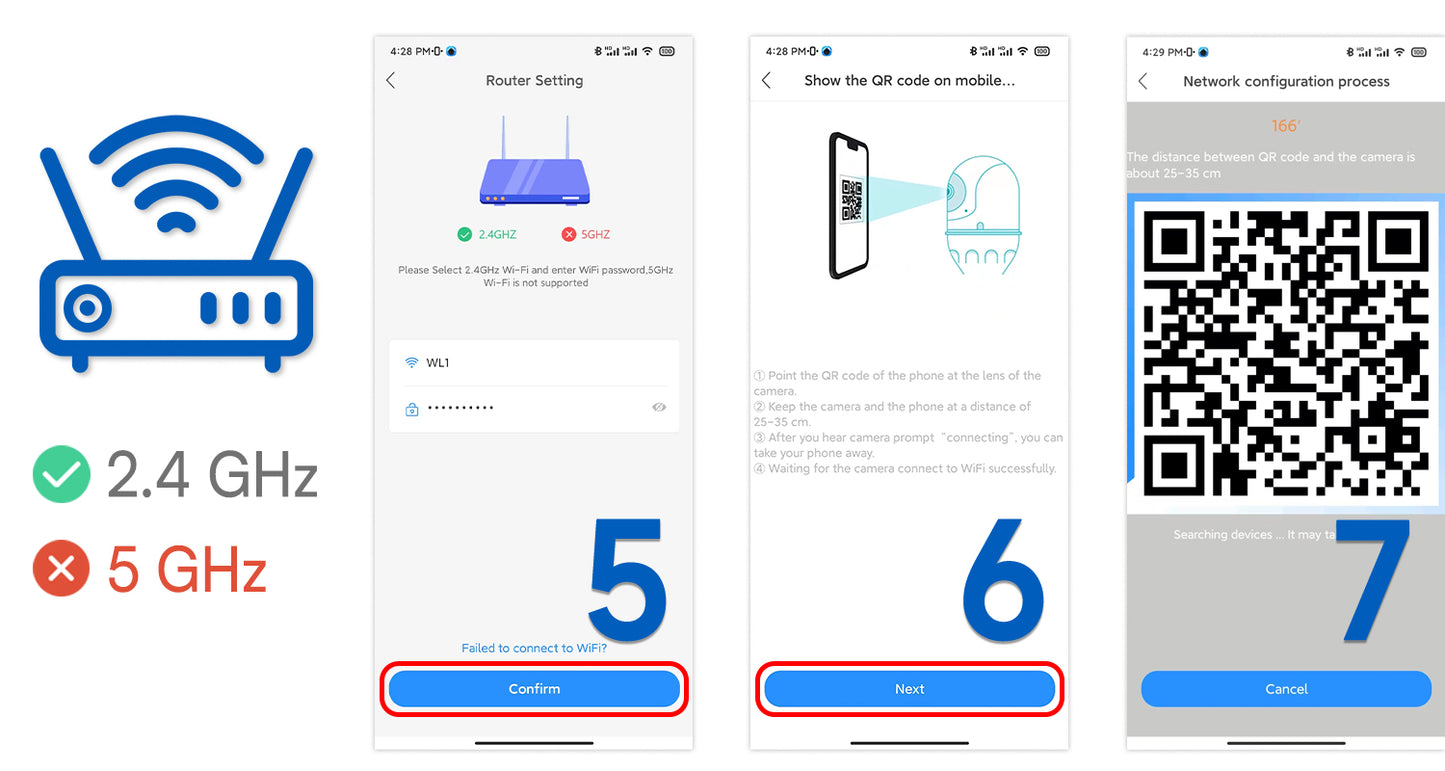
In “Router Setting” page of the app, please select 2.4GHz WiFi and enter WiFi password (Note:5GHz WiFi is not supported.), click “Confirm>Confirm” into “Show the QR Code on Mobile phone” page, click “Next” into “Network Configuration Process” page, then let the camera scan the QR code on your phone until you hear “Connected to router successfully”.
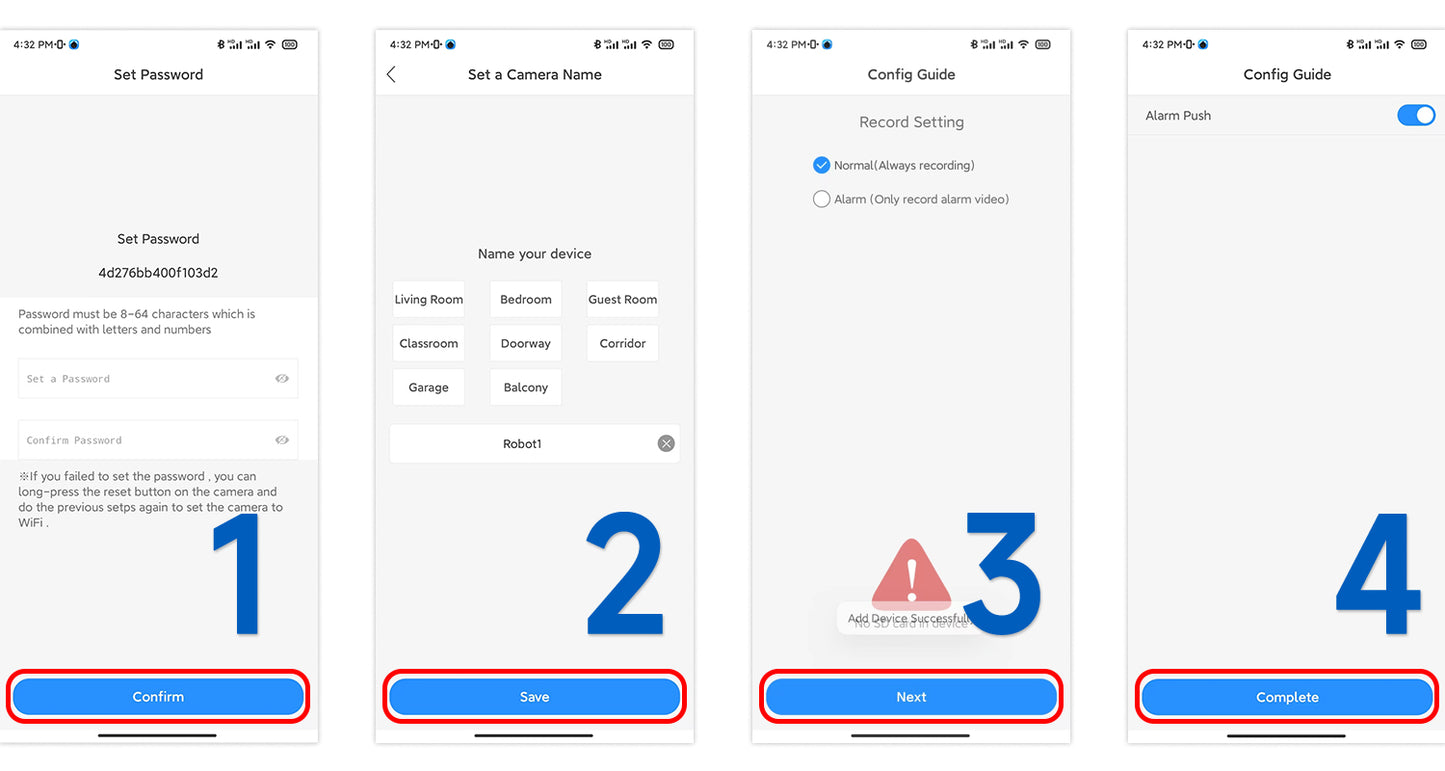
6. Set the Device Password
After connecting to WiFi successfully, “Set Password” page will pop up, please set a password for your camera, then click “Confirm” into “Set a Camera Name” page, please name the camera, then click “Save” into “Config Guide” page, select the record setting, then click “Next” into next page, open the “Alarm Push” button, click “Complete”, then the camera will be added successfully.

